
Sharing WiFi Easily: 3D Printed QR Codes
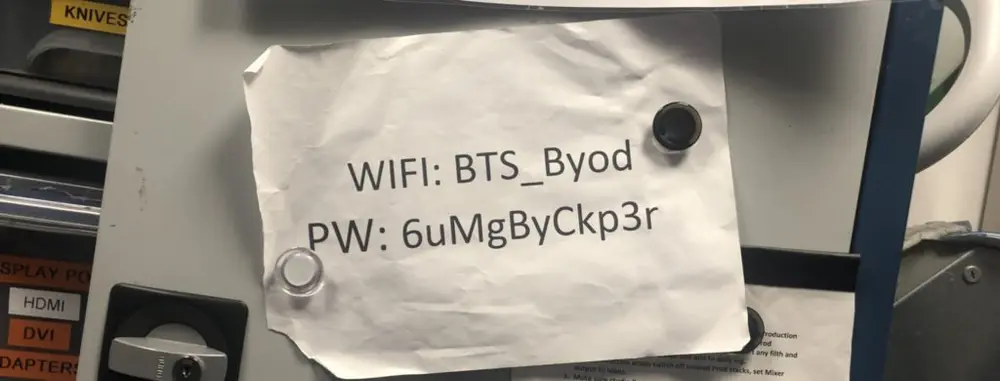
Where I work, there are a bunch of freelancers and clients. Undoubtedly, all of them end up wanting to connect to the Wi-Fi. Working in the Engineering Department, we always get asked for the details. Before this project, we had the login details pinned to the wall, but I thought of a better way to share the details!
QR codes are great and recently iOS added native support for QR code reading (for Android it varies, some include it by default and others require an app). QR codes natively support Wi-Fi codes and doing so removes the faff of having to type out the random string of characters that most passwords are.
Instead of just generating and printing a QR code, I wanted to create something better and more permanent. Recently I’ve been messing around with 3D printers, and thought this was the perfect project to get my teeth into it.
For the next stages, I’ll be using Fusion360, which is my 3D design software of choice. You can sign up and download the Hobby version of Fusion360 for free here. I’ll show the process step by step below, so even if you’ve not used Fusion before, you can still create your own QR Puck.
Generating the QR Code
In order to create the 3D version of the QR code, you’ll first need to generate a normal one. For this I used https://qifi.org/ but there are many options out there. Fill out the form with your Wi-Fi details, then press the ‘Generate!’ button.
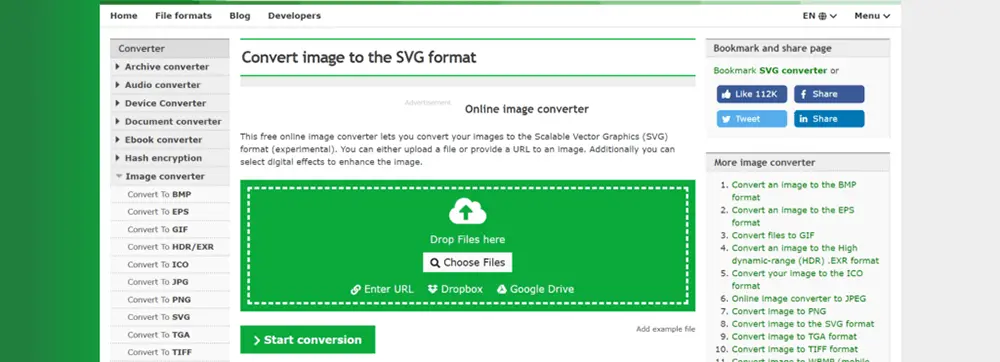
After generating your QR code, press the ‘Export!’ button. This will give you a .png image of the QR code. However, in order for it to work nicely, we Fusion 360 we need the image in the .svg format. For this I used https://image.online-convert.com/convert-to-svg.
Sketching the QR Code
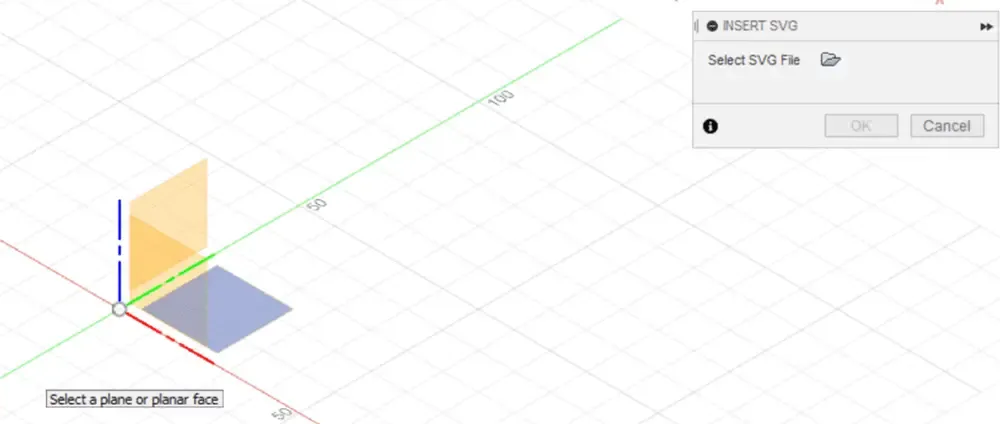
Now that you’ve got your QR code, you can model it in 3D! Opening Fusion, the first thing to do is select the dropdown beneath ‘INSERT’ and press ‘Insert SVG’.
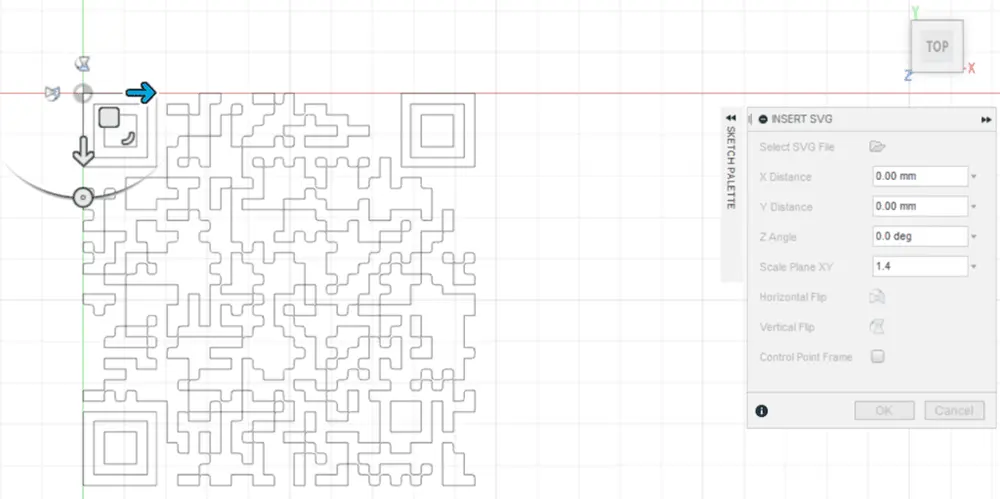
You will then see three squares in the viewfinder window. Move your mouse to match the below image and left-click—this is selecting the plane that you’re going to insert the SVG into.
After confirming, the camera will rotate, showing the grid from above. Click the folder icon next to ‘Select SVG File’, and import the QR code .svg file. In the same window, there will be additional options. Select the ‘Scale Plane XY’ option and set this value to 1.4, and then press ‘OK’.
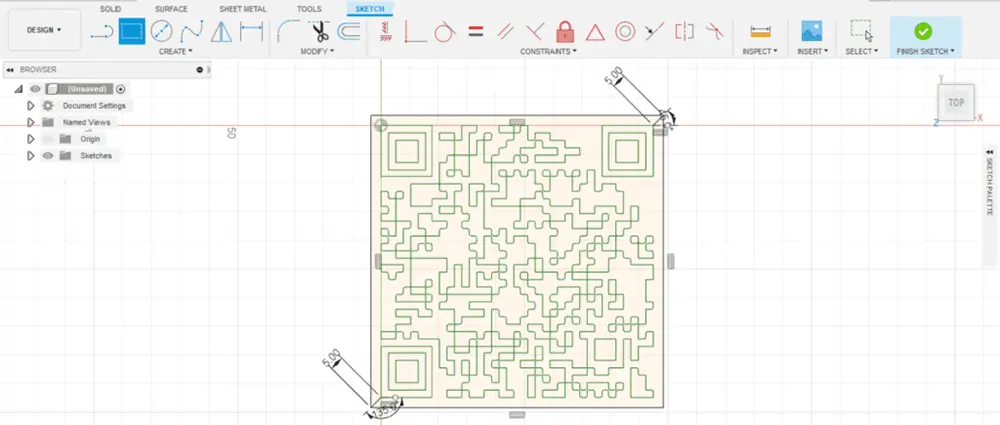
You’ll want a slight edge to the QR code, which we can do easily using the line tool. From opposite corners, you’ll want to create diagonal lines away from the edge of the model. To do this precisely, complete the below steps with the Line Tool selected:
- Click the first corner of the QR code.
- Press ‘5’ then hit ‘Tab’.
- Depending which corner you’re doing, type either ‘45’ or ‘135’ then hit ‘Enter’.
You can now use the 2-Point Rectangle Tool to connect these two points, which gives the QR code a border. This is all the sketching needing to create your QR code. To complete the sketch, hit the ‘Finish Sketch’ button in the top right corner.
Building the QR Code
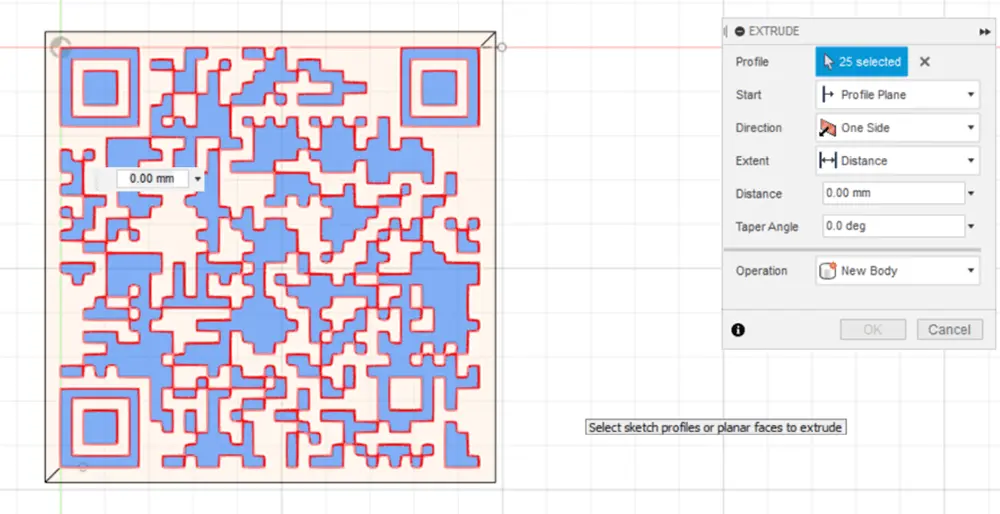
Now that you’ve created a sketch of your QR code, you can now make it 3D. First press ‘E’, which opens the extrude menu, and left-click on all the parts of the QR code that need to be black. Then set the Distance option to 7mm and hit OK.
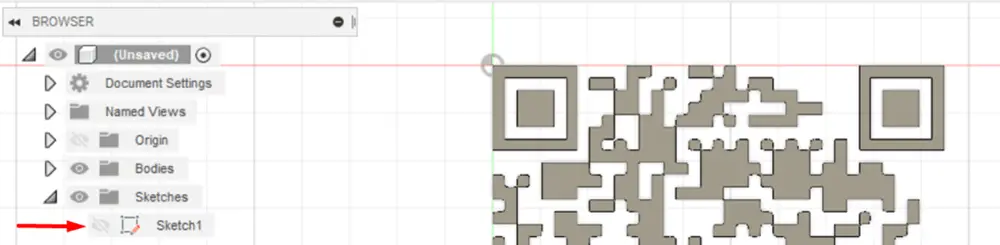
Next you’ll want to extrude the lower part of the QR code. To do this, you will first need to unhide the Sketch layer containing your QR code. To do this, click the dropdown menu next to the Sketches folder and then hit the greyed out eye icon.
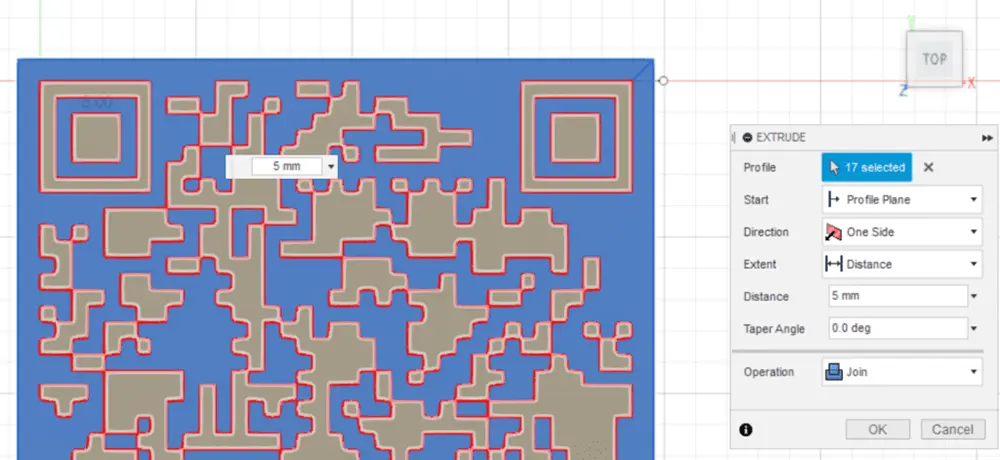
As before, you’ll need to use the ‘E’ Extrude Tool for the remaining areas of the sketch. However, before completing the Extrude, there are two options you will need to change:
- Change Distance to 5mm.
- Change Operation from ‘New Body’ to ‘Join’.
Exporting the QR code
Now that the QR code model is complete, you can export it as an .stl for printing. To do this:
- Click the dropdown next to the Bodies Folder.
- Right-click on the Body (Body1), and select ‘Save As STL‘.
- On the window that appears to the right, press OK, and choose where to save your file.
Now you’ve got your file, you can put it through your chosen slicer. For this, there are two options to differentiate the lows and highs of the print:
Option 1: 3D print the whole model in one colour, then paint the raised surface (black bits) of the QR code.
Option 2: Print the base of the QR code, pause the print and swap filament colours, then resume the print. This is the method I used, and I recently created a short guide describing a way to do this within Cura, which you can find here.
This project was short and had a great outcome, and provided me with a great excuse to use Fusion360. Now when people come to our office instead of reading off the assorted jumble of letters and numbers, they can just scan the QR code and get on with their day. I’m definitely going to print more of these to use both at work and at home!
If you have questions about the above project, drop a comment below, and I’ll happily answer them!