Making Dumb Lights Smart with Zigbee: PAC-MAN Ghost
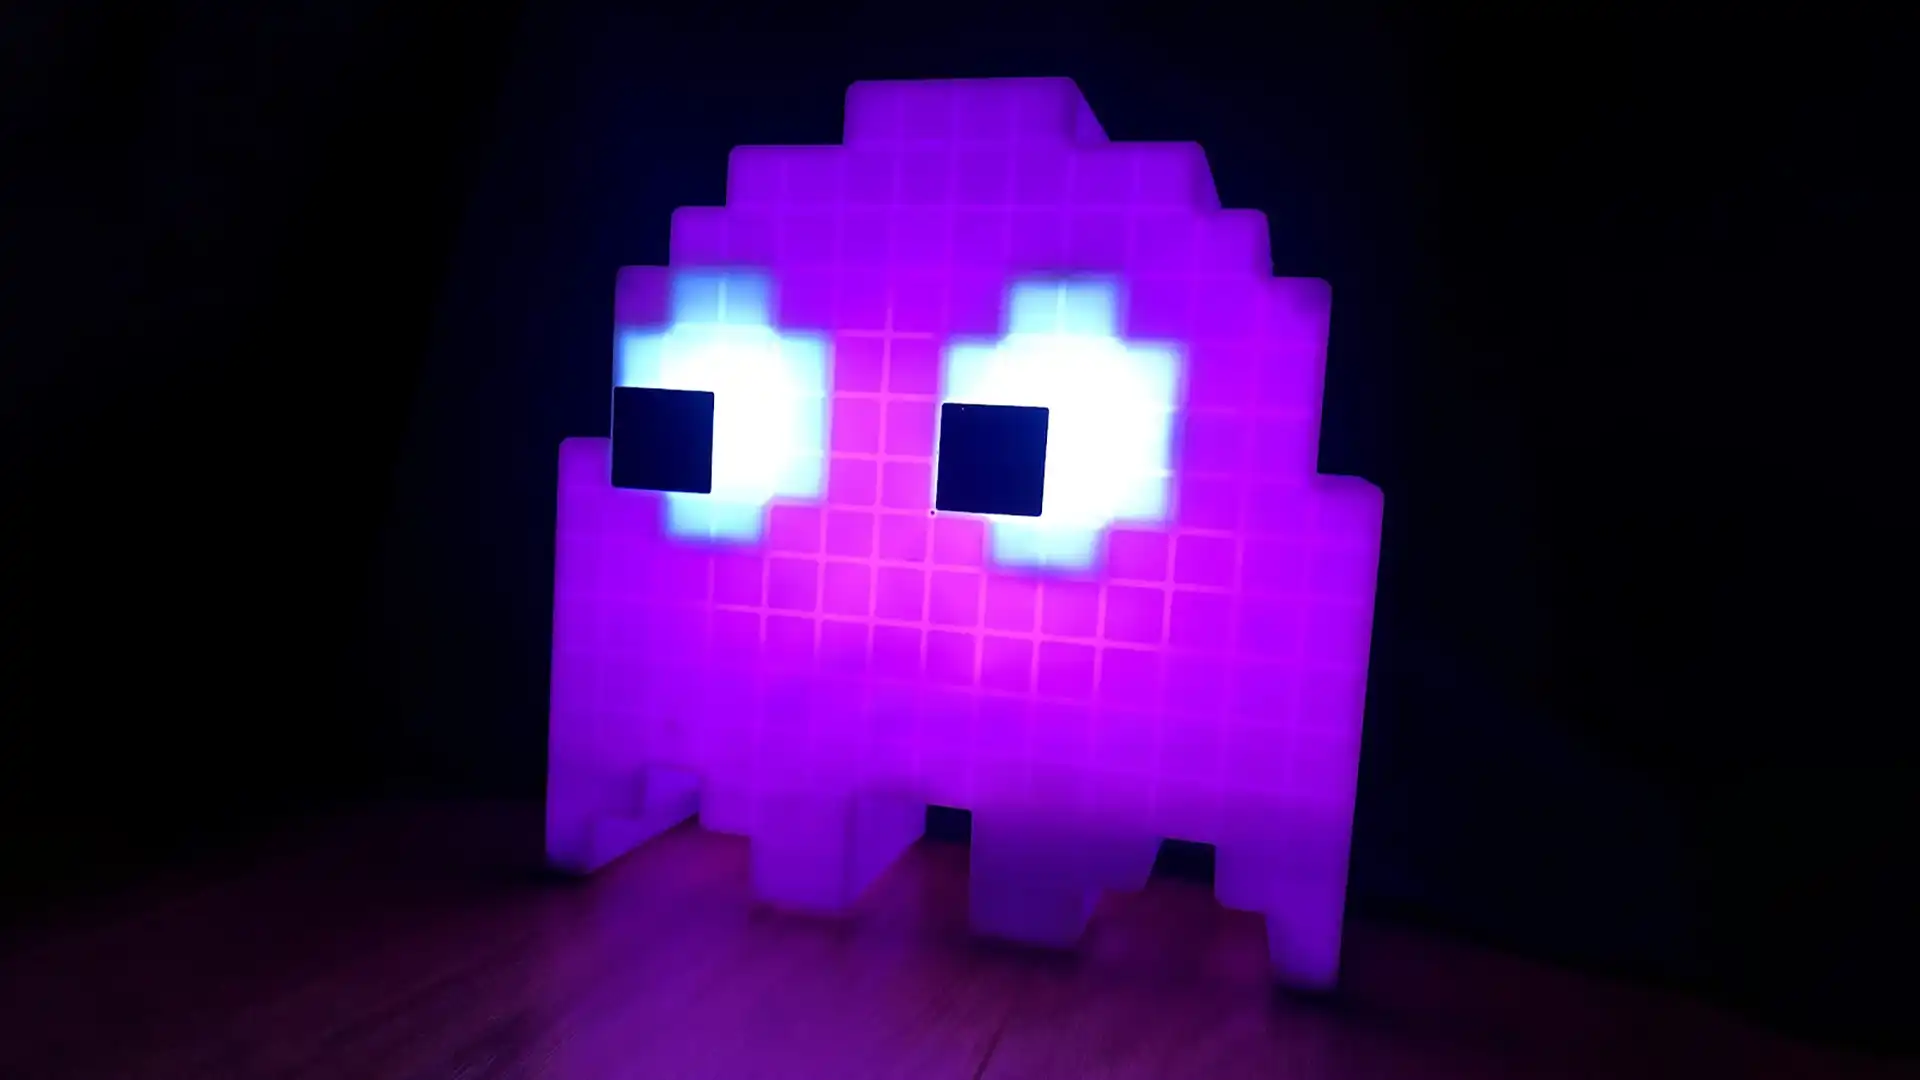
A while back, I wrote a guide about some cheap LED controllers that work with Hue and HomeKit. You might have noticed the PAC-MAN Ghost lamp in the cover photo. Since getting those controllers, I’ve really wanted the Ghost lamp to be controlled by HomeKit.
The lamp’s original functionality is fairly basic. The only way I could add it to HomeKit would be via a smart plug, and that just won’t do! Whilst this guide focuses on upgrading my PAC-MAN Ghost lamp, you could apply this to make almost any light Hue/HomeKit compatible!
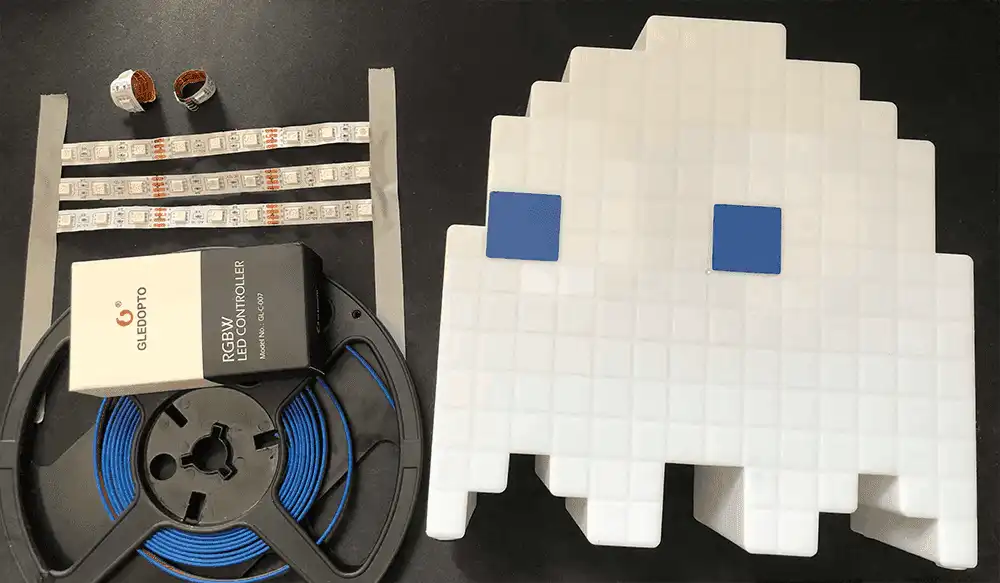
I’ve now got a bunch of Zigbee controllers throughout my house and when this idea came into my head, I thought it would be the perfect time for another! The full list of equipment that I used for this project (including the lamp) is at the bottom of this post. Depending on what you’re upgrading, you might also need to be handy with a soldering iron!
Preparing the PAC-MAN Ghost
The first step is to remove the casing of the ghost to see what’s inside. Annoyingly, additionally to the screws, the seam seems to be glued in places, so recommend using a pry tool to get it apart.
The guts of the lamp were pretty basic, containing only a small circuit-board and five LEDs (two to light up the eyes of the ghost, and three for the body). As the brightness of the ghost was fairly low, we can rip out all the existing electronics without worry.
When I thought about improving lamp’s brightness, I thought the best way would be to include several short strips of LEDs across the back. I setup the LEDs as pictured below and the resulting brightness much improved, and was more even across the ghost too! For this initial test/project, I used some tape to secure the LEDs, but recommend using adhesive tape or glue.

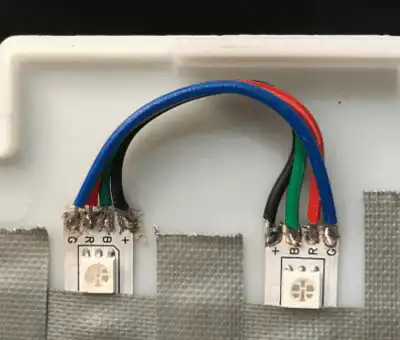
After you’re happy with your LED placement, you can move onto soldering the strips together. I used colour coded wires, annoyingly the order of the LED pins is different to the order of the wire colours but that ultimately doesn’t matter. I recommend using a snake pattern for wiring up, with some longer cables at the bottom to connect the LED controller.
The other part needing LEDs will the ghost's eyes, there are two methods for doing this depending on which type of controller you pick!
Picking the right Controller
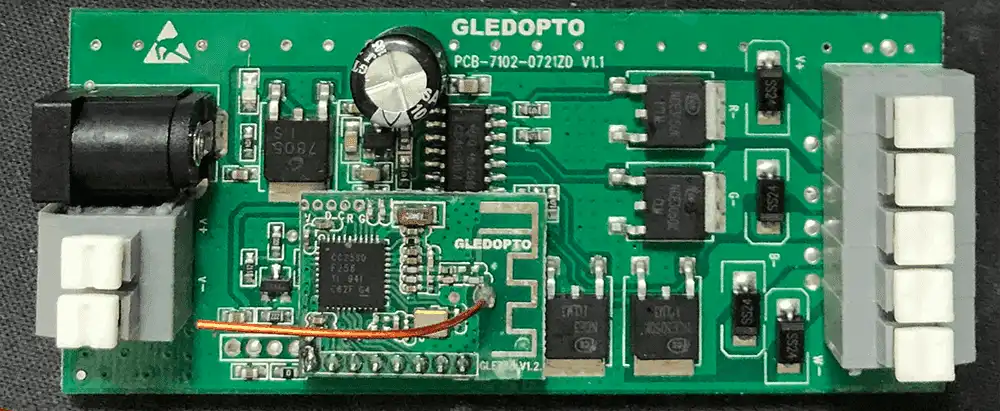
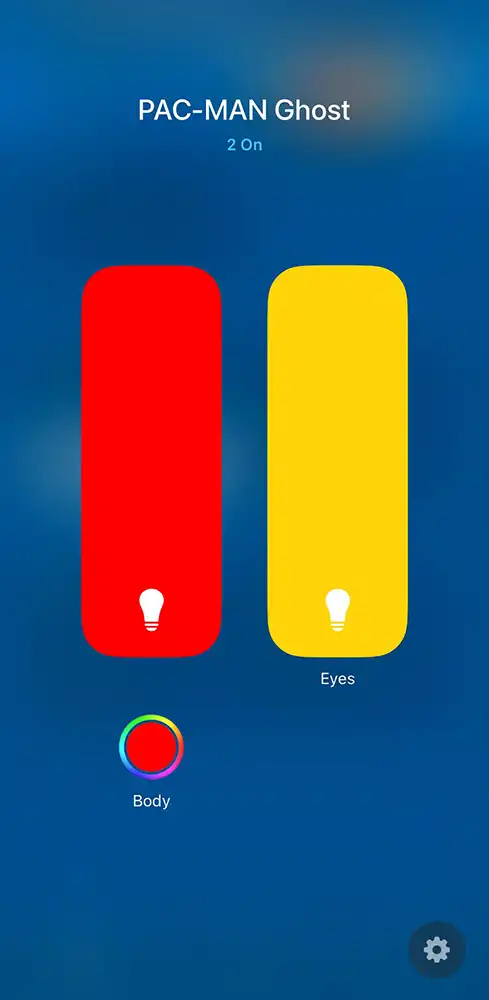
The controllers I’ve used have a range of different configurations. For this project, I opted for the 2 ID RGBW controller, as it meant I could control the eyes and body separately as two lights in the Hue/HomeKit app. Wiring the RGB strip to the RGBV+ terminals and then a separate white light to the W and V+ terminals.
Once you’ve got your controller of choice, prise it open, which you can do along the seam at the bottom of the controller. If putting inside your light, I recommend removing the case so that it takes up less room. One thing to make sure is that you note down the terminal to avoid any guesswork when connecting each wire.
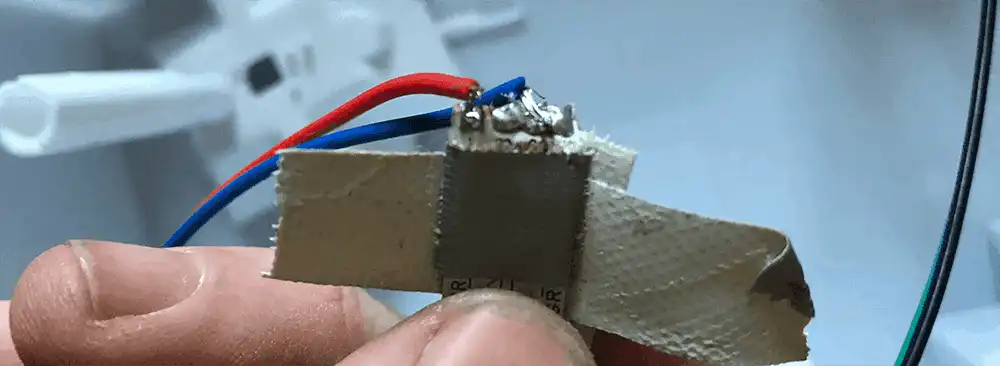
Adding the eye LEDs
You could either use the existing LEDs or buy some White LEDs for the eyes. I opted for the latter and using a healthy amount of solder; I joined the RGB pins together to a single wire and connected a second wire up to the + pin. Creating two of these and taped them both over the eyeholes of the Ghost lamp.
Assembly and Results
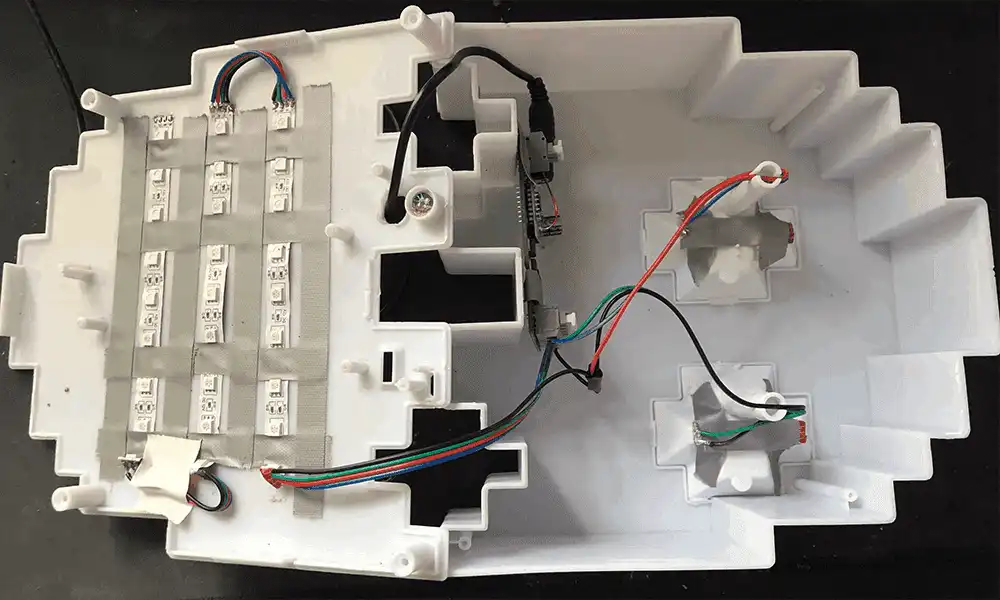
I assembled the lamp, as you can see in the below picture, placing the controller in a similar location to the original and powered up the unit. I did have to expand the power hole to fit the cable I use.
Sealing up the PAC-MAN Ghost and powering it up, I added the controller to the Hue app. If you’re having issues adding this device to Hue, then I recommend resetting the device. This is done by turning the power to the unit on and off five times quickly.
The last step to this project was to add the lamp to HomeKit. For me this was as simple as restarting my Homebridge hub and the eyes and main lamp appeared in HomeKit nicely under one device. If you haven’t checked out my previous guide for adding these Gledopto controllers to HomeKit, I recommend checking it out here.
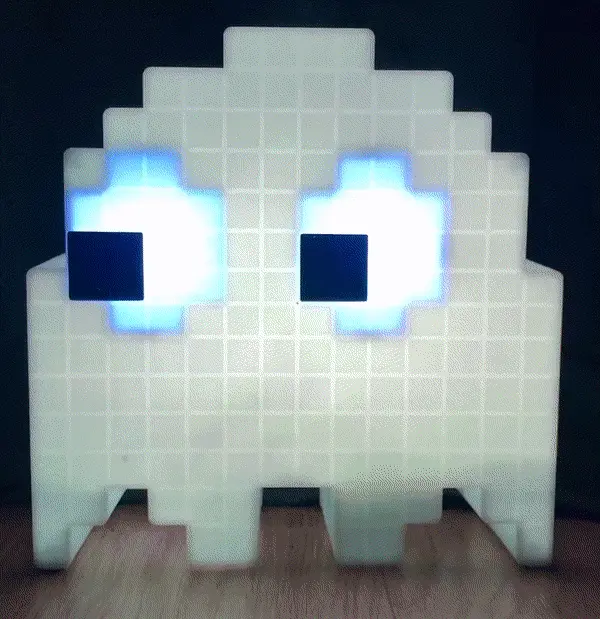
Overall, I’m extremely happy with the end results of this project. I’ve definitely opened Pandora’s Box of ‘smartifying’ my existing lights in HomeKit! If you’ve followed this guide and have questions about this project, drop a comment below!
Featured Equipment
As an Amazon Associate, TechTrail earns from qualifying purchases made with some store links.